
Practical Microclimate-Based Spacing Tips for Organic Farms
Practical Microclimate-Based Spacing Tips for Organic Farms provides actionable guidelines to set plant spacing and planting density based on within-field microclimate zones. This guide explains how to measure microclimates, adjust spacing for light, wind, humidity, and soil moisture, and apply crop-specific density ranges for organic systems. Follow testing steps, management rules, and examples to raise yield, reduce disease pressure, and improve resource efficiency.
What is microclimate-based spacing and why does it matter?
Microclimate-based spacing means setting plant spacing and density to match local variations in temperature, humidity, light, wind, and soil moisture within a field. The practice matters because microclimates cause crops to respond differently across short distances; optimizing spacing increases yield per area and lowers pest, disease, and water stress risks.
How do I map microclimates on my organic farm?
Map microclimates by combining simple observations, low-cost sensors, and seasonal records to produce zones for spacing decisions. Walk fields at different times of day for one week in each season to note frost pockets, wind corridors, shaded benches, and wet depressions.
Use inexpensive sensor loggers for air temperature, soil temperature, and volumetric soil moisture at 5-10 sample points per hectare to capture variability. Deploy sensors at canopy height and at root-zone depth when possible.
Integrate historical yield maps, soil maps, and drainage maps. Combine with tools like infrared thermometers or smartphone thermal apps for quick scans.
Refer to microclimate mapping methods for small farms for implementation details and zone creation in planning documents like crop maps; see how to overlay planting schedules in diversified small-farm crop maps by microclimates.
What are the microclimate variables that should change spacing?
Adjust spacing based on light availability, wind exposure, humidity, soil moisture, and temperature extremes at the planting site. Each variable alters canopy architecture, evapotranspiration, and disease spread.
- Light: Reduce spacing in low-light zones to maximize light capture per plant; widen spacing in high-light zones to avoid leaf scorch and overheating.
- Wind: Increase windward spacing to reduce mechanical damage and airflow restriction; use windbreaks to allow denser plantings downwind.
- Humidity and leaf wetness: Increase spacing where humidity and leaf wetness are high to reduce foliar disease incidence.
- Soil moisture: Increase spacing in wet depressions to reduce root disease; decrease spacing on well-drained sites to improve water-use efficiency.
- Temperature: Increase spacing where heat accumulates to lower canopy temperature, or use denser plantings in cool pockets to boost micro-warmth.
How do plant functional groups change spacing decisions?
Change spacing rules for broadleaf greens, brassicas, solanaceae, legumes, roots, and vining crops because growth habit and canopy architecture differ. Use group-specific ranges to start field trials.
Recommended starting density ranges per square meter for guidance only:
- Leafy greens (lettuce, spinach): 16-36 plants/m2 for baby and cut-and-come-again; 4-9 plants/m2 for full-head lettuce.
- Brassicas (broccoli, cabbage): 1-3 plants/m2 for large heads; 9-16 seedlings/m2 for staggered tray production.
- Solanaceae (tomato, pepper, eggplant): 1.-2.5 plants/m2 for indeterminate tomato in trellised systems; .5-1.2 plants/m2 for open bushes.
- Legumes (bush beans): 10-25 plants/m2; vining beans on supports: 3-8 plants/m2.
- Root crops (carrot, beet): 50-150 plants/m2 depending on harvest size; thin to target diameter.
- Vining cucurbits (cucumber, squash): .5-1.5 plants/m2 on ground; 1.5-3.5 plants/m2 when trellised vertically.
How should I adjust spacing by light microclimates?
Increase spacing where sun exposure is intense to prevent heat stress and reduce spacing where light is limited to improve light interception. In shaded alleys or under partial shade, reduce spacing by 10-30% depending on percent shade.
Set planting grids: for a zone receiving 70-100% full sun, use recommended baseline spacing. For 30-70% light, tighten spacing 10-20%. For <30% light, choose shade-tolerant cultivars and increase density up to 30% if plants remain vegetative.
How should I adjust spacing by wind and exposure?
Widen spacing in wind-exposed areas and orient rows perpendicular to prevailing wind only when needed to reduce soil erosion and plant lodging. Plant windbreaks or hedgerows and then increase planting density downwind where shelter reduces stress.
Where wind dries foliage quickly, a wider footprint reduces transpiration demand and mechanical rubbing. Increase plant-to-plant spacing by 10-25% on windward edges.
How should I change spacing in wet vs dry soil microclimates?
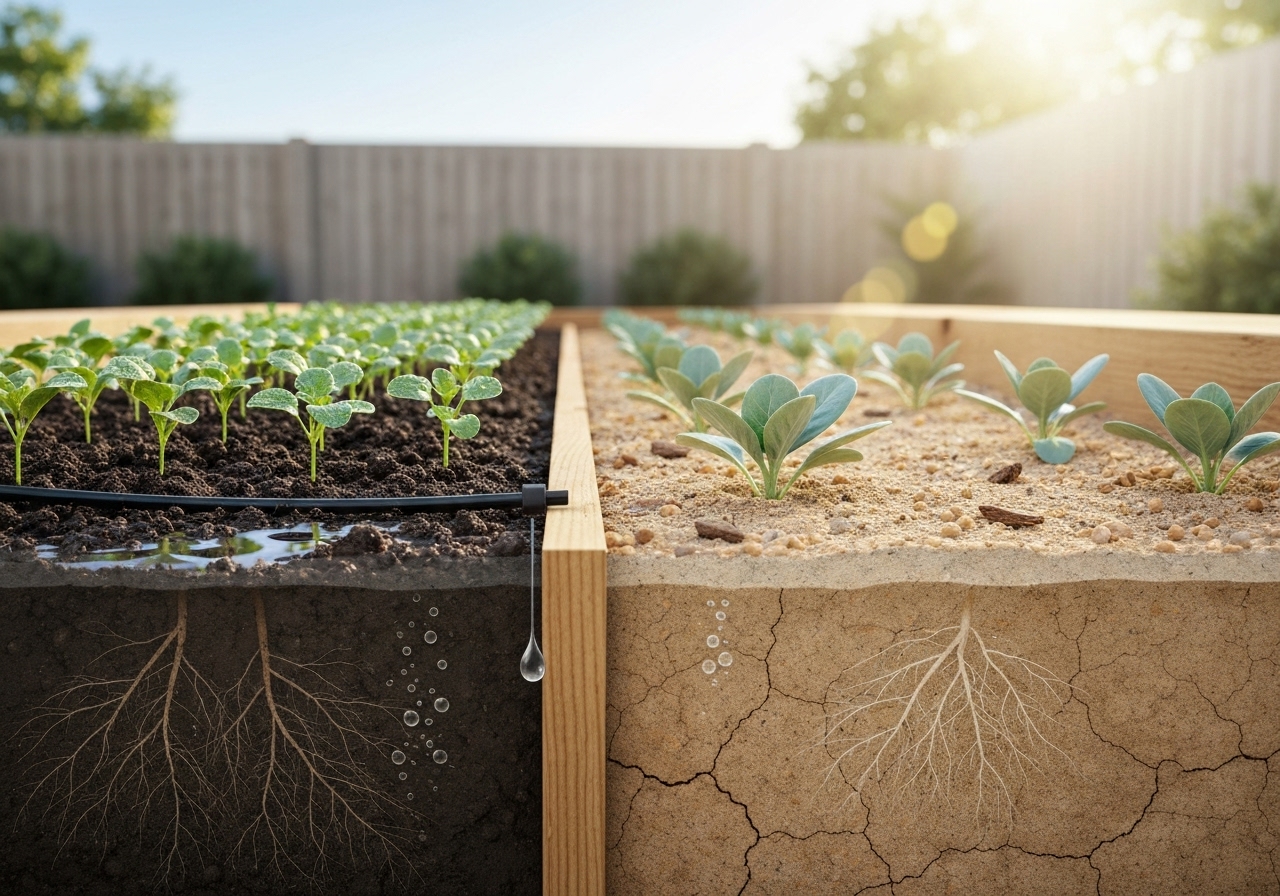
Widen spacing on persistently wet or poorly drained patches to reduce root disease risk; tighten spacing on well-drained soils to maximize yield per area. Avoid dense plantings in anaerobic soils.
Tight spacing in dry zones can improve canopy shading and soil moisture retention but raises competition; balance with deeper-rooted companion species to manage drought stress.
How does crop rotation and spacing interact on small organic farms?
Integrate spacing choices into rotation planning so that dense plantings do not repeatedly follow susceptible crops in the same microclimate, reducing disease carryover. Use rotations that alternate root, leaf, and fruit crops and allow cover crops to break pest cycles.
Link rotation maps to microclimate zones to avoid repeating high-density plantings in disease-prone pockets. For adaptive rotation templates and low-input plans, consult resources such as adaptive low-input crop rotation plans for small farms.
When should I use block planting vs row planting?
Use block planting to optimize light capture and pollination for compact crops; use rows for mechanization, airflow, and ease of access. The choice depends on crop type, microclimate, and labor or tool constraints.
Block planting increases edge density and can improve microclimate buffering. Narrow rows with wider between-row spacing balance microclimate control and operator access on small organic farms.
How do companion planting and polyculture affect spacing?
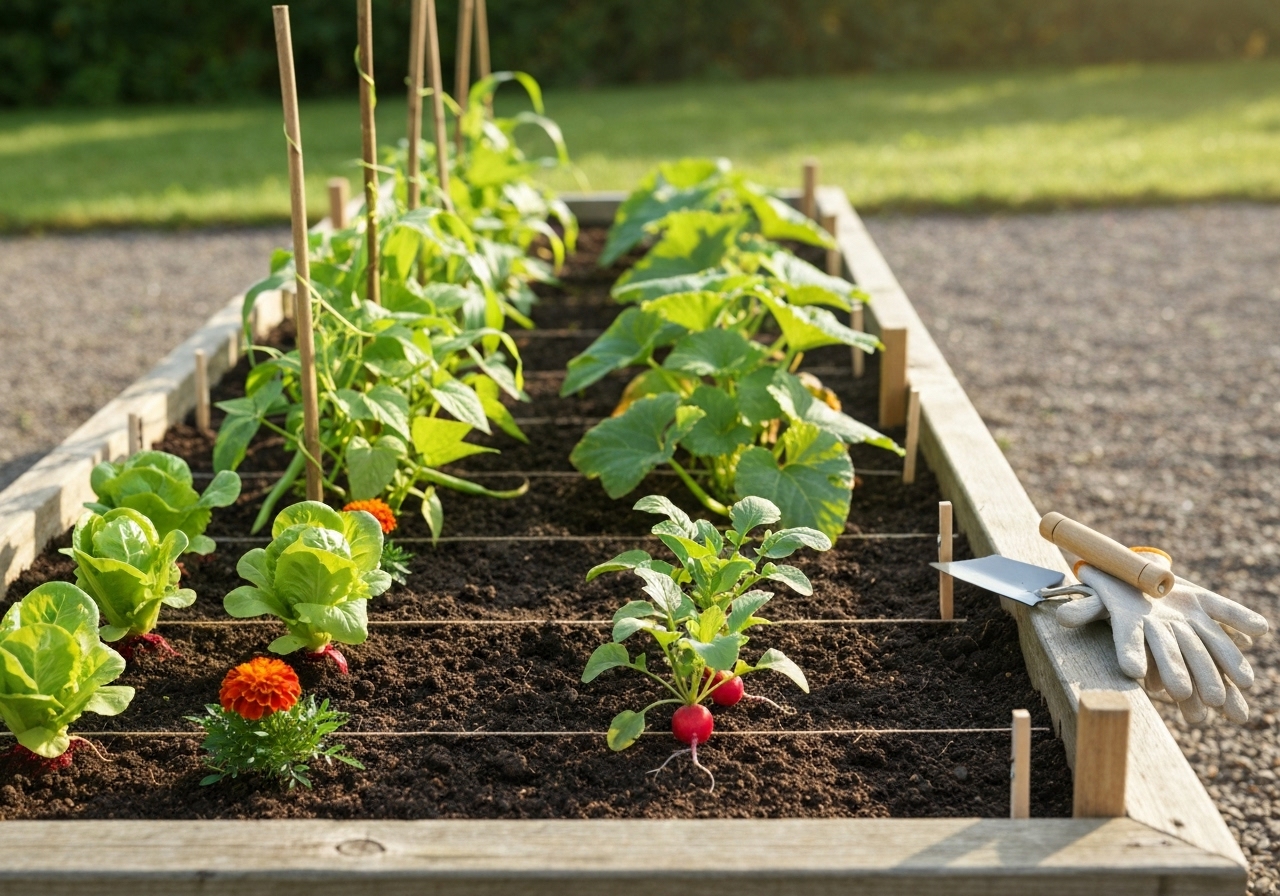
Adjust spacing to allow complementary species to share vertical and temporal niches; place taller, sparser species with shorter, denser ones to maximize total productivity. Companion plants reduce pests and help microclimate buffering when placed intentionally.
Examples: Plant maize at wider spacing with dense understory of beans and squash (three sisters) or intersperse nitrogen-fixing legumes at 10-20% of population density with heavy feeders to improve soil and reduce needed spacing in later crops.
What are practical spacing rules for transplants versus direct-seeded crops?
Transplants can be placed at slightly wider spacing than direct-seeded crops because they start larger; thin direct-seeded beds early to target final density. Use nursery-grown transplants to control spacing precisely and stagger planting to match microclimate windows.
When direct seeding, sow 20-40% more seeds in low-germination or high-attrition zones; thin soon to avoid late competition that reduces quality.
How should irrigation and fertility change spacing decisions?
Increase spacing when irrigation or nutrient supply is limited to reduce competition; tighten spacing where reliable water and fertility inputs support higher per-area yields. In organic systems, where fertility is often managed biologically, spacing must account for slower nutrient release.
Design plant populations to match delivered water: drip-irrigated beds support higher densities than flood-irrigated or rain-dependent zones.
How can spacing reduce pest and disease pressure?
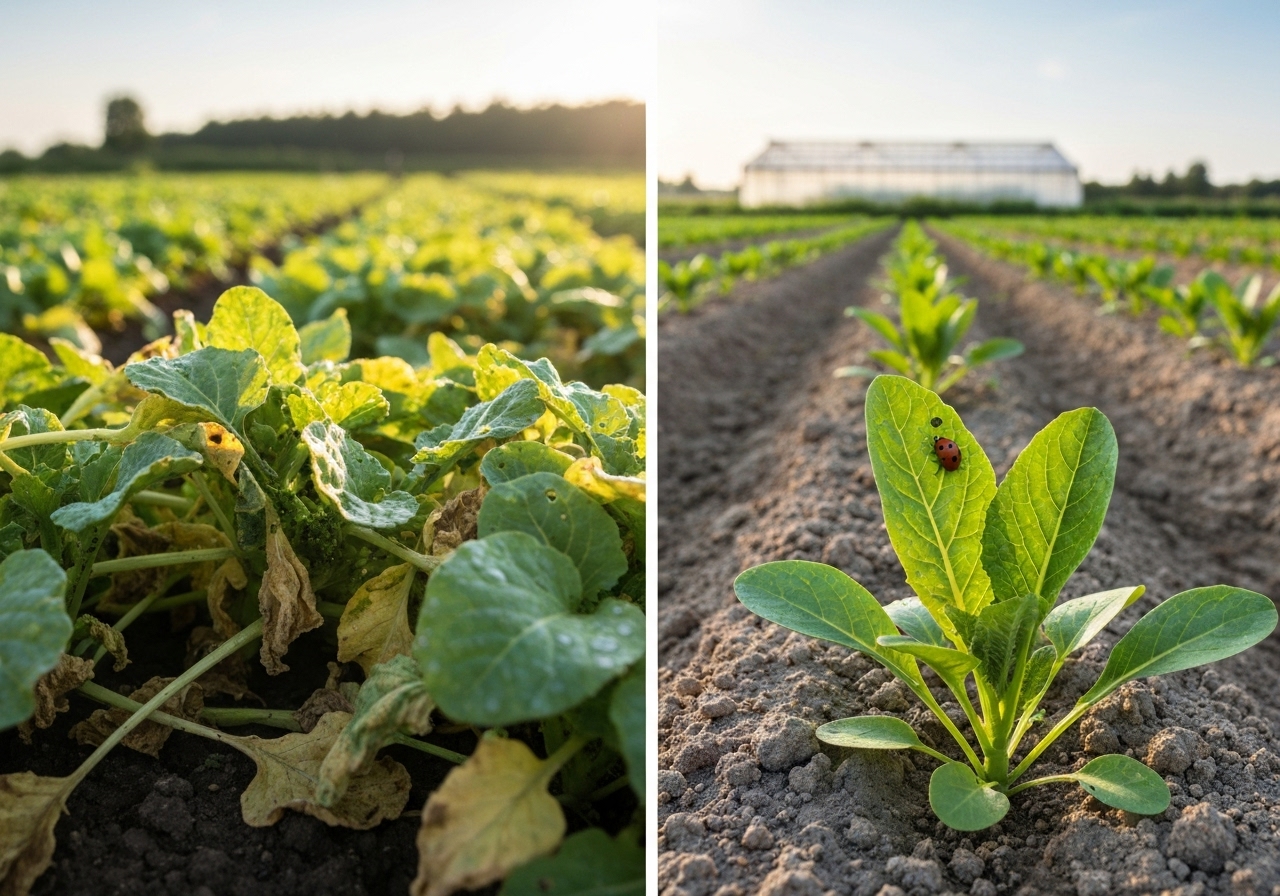
Use wider spacing to improve airflow and reduce humidity within the canopy, lowering foliar disease risk; use mixed-species plantings to interrupt pest host-finding. Rotate spacing across seasons to avoid creating persistent refuges for pests in the same microclimate pockets.
Thin during wet seasons and in low-lying humid zones to reduce leaf wetness. Plant trap crops at field edges at wider spacing to divert pests from main stands.
How to run field trials to find the best spacing for my microclimates?
Design replicated small plots across mapped microclimate zones testing 2-4 spacing levels with consistent management and measure yield, disease incidence, and quality. Use randomized blocks and record soil moisture, canopy temperature, and harvest data for statistical insight.
Start with 1-3 m2 replicated plots: A (baseline spacing), B (20% tighter), C (20% wider). Run trials for at least two seasons and in contrasting weather years to capture variability.
What simple tools and sensors help manage spacing decisions?
Use soil moisture probes, low-cost air temperature loggers, light meters, and handheld canopy thermometers to collect microclimate data that inform spacing choices. GPS-enabled yield mapping or harvest weight per bed provides feedback for future density adjustments.
Sensor guidance integrates well with microclimate zoning and precision approaches; for sensor-led mapping and planting overlays see microclimate mapping resources like microclimate zoning: boost yields on small farms.
How do microbial amendments interact with plant density?
Use microbial consortia to improve nutrient availability and root health which can support increased density in appropriate microclimates; avoid high-density plantings in pathogen-prone wet zones even with inoculants. Healthy soil biology improves resilience to competition and stress.
Design microbial seed coatings and consortia for specific crop families to increase establishment and reduce thinning losses; for field-scale soil microbe mapping and application strategies consult resources like designing on-farm microbial consortia to enrich soil.
How should spacing change through the season with dynamic microclimates?
Adjust spacing by staggering plantings, pruning, or selective thinning through the season as canopy structure and microclimate evolve. Early-season tight plantings can be thinned to single plants later, or interplanted cover crops removed after establishment to free space.
Use staggered planting to avoid peak competition windows and to smooth labor needs for thinning and harvest.
What are common mistakes and how to avoid them?
Common mistakes include using blanket spacing across diverse microclimates, ignoring airflow needs, and not testing local adjustments. Avoid these by mapping microclimates, running small trials, and recording outcomes.
Do not over-densify in wet, shaded, or compacted patches. Do not underuse high-productivity microclimate niches where denser spacing could increase per-acre yield.
How do scaling and labor affect spacing choices on small organic farms?
Align spacing to available labor, bed width, and tools to ensure sustainable management; denser plantings often require more thinning and precise harvest techniques. Choose spacing that balances per-area yield with labor input and post-harvest handling capacity.
Use mechanized planters or transplanters when dense, uniform spacing is required at scale to reduce labor costs without sacrificing plant health.
Which quick checklist helps implement microclimate-based spacing?
Follow a simple checklist: map microclimates, classify zones, choose baseline spacing per crop, run small trials, record results, and update maps annually. Re-evaluate after major landscape changes like tree planting or irrigation upgrades.
- Step 1: Walk and map microclimate zones.
- Step 2: Select baseline crop spacing by functional group.
- Step 3: Adjust spacing for each zone (+/- 10-30%).
- Step 4: Run replicated plots and collect data.
- Step 5: Standardize successful spacing into the farm calendar and rotation plan.
What resources and next steps should farmers use?
Use farm-specific microclimate maps, rotation plans, and soil health practices to operationalize spacing decisions and improve over time. Integrate spacing adjustments into your seasonal planning and use the farm calendar to schedule trials and implementation.
Combine spacing rules with rotation and soil management plans to sustain productivity; adaptive rotation templates and microclimate calendars help synchronize crop placement with site potential.
Implement these principles gradually. Document results. Treat microclimate-based spacing as a precision, low-cost lever to increase organic system resilience and profitability.


