
Backyard Mini-Greenhouse Venting Plan for Year-Round Growth
Backyard Mini-Greenhouse Venting Plan for Year-Round Growth
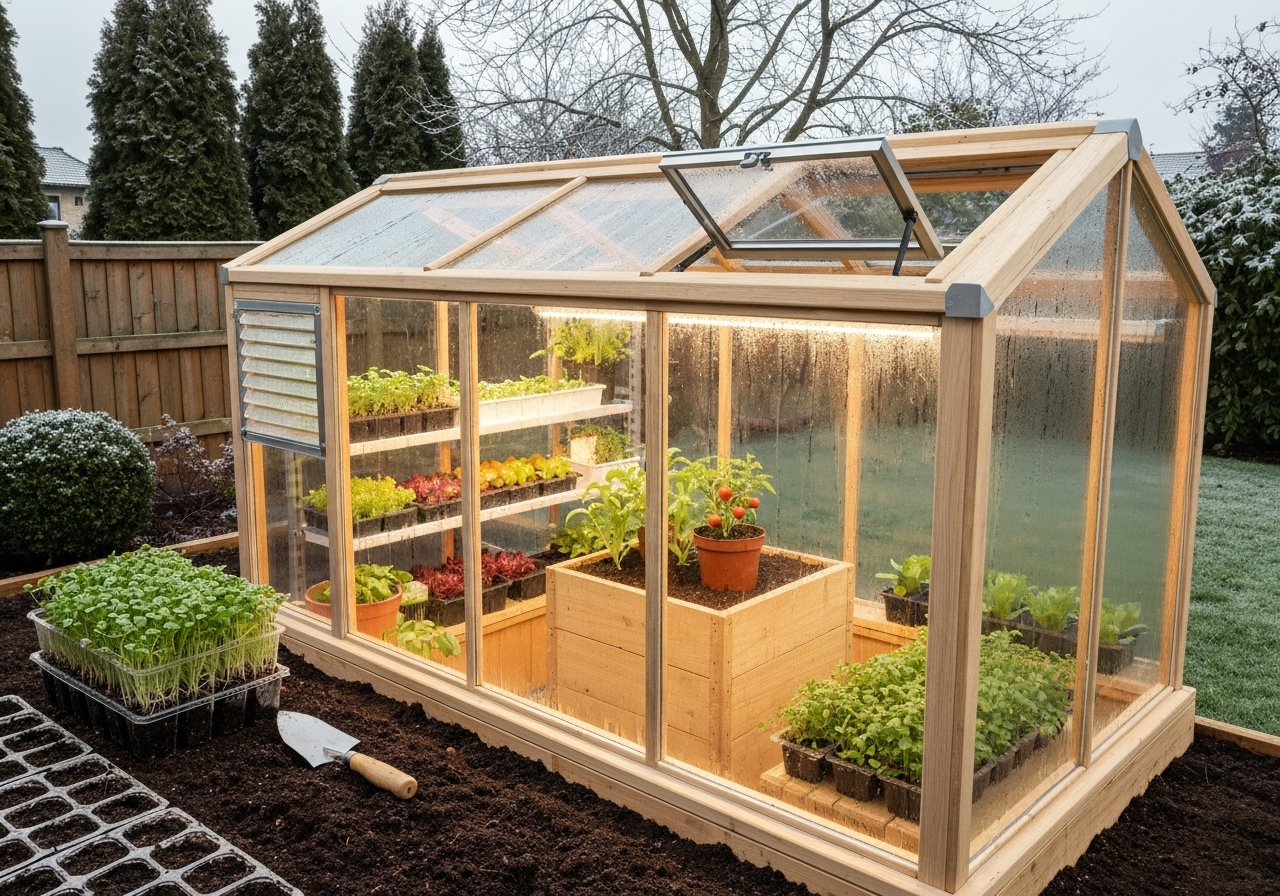
Design a reliable venting plan to keep temperatures, humidity, and airflow within optimal ranges for year-round growing in a backyard mini-greenhouse.
This guide gives step-by-step venting strategies, calculations, equipment choices, seasonal schedules, and maintenance actions to prevent heat stress, mold, and frost problems while extending your growing season.
What is a backyard mini-greenhouse venting plan?
A backyard mini-greenhouse venting plan is a layout and schedule for moving air through a small structure to control temperature, humidity, and gas exchange.
The plan includes passive vents, fan placement, control logic, seasonal settings, and maintenance steps to support plant health year-round.
Why does ventilation matter for year-round growing?
Ventilation controls four key variables: temperature, humidity, carbon dioxide level, and pathogen dispersal.
Without ventilation, heat builds quickly, humidity spikes, and diseases increase; with proper ventilation, plants grow faster and resist stress.
Extension publications and horticultural guides from university extensions and the Royal Horticultural Society emphasize ventilation as a principal factor in greenhouse productivity.
How do I choose passive versus active ventilation?
Use passive ventilation when you want low-cost, low-energy airflow through vents or roll-up sides.
Use active ventilation when you need reliable, measurable air-exchange rates, especially in hot summers or tightly sealed mini-greenhouses.
Choose a hybrid approach for most backyard units: passive vents for mild conditions and fans for extreme heat or when precise control is required.
When is passive ventilation adequate?
Passive ventilation handles mild temperature swings and moderate airflow needs when cross-ventilation is possible and wind exposure exists.
Design passive vents to provide open area equivalent to 10-20% of floor area; many extension services recommend about 15% openable area.
When do I need active ventilation?
Install fans when you need consistent air changes per hour, when the greenhouse is tight, or when internal heat loads from lights or sunny days exceed passive cooling capability.
Automated fans are essential in warm climates and for greenhouse builds with polycarbonate or double-layer plastic glazing that trap heat.
What are the basic principles for airflow in a mini-greenhouse?
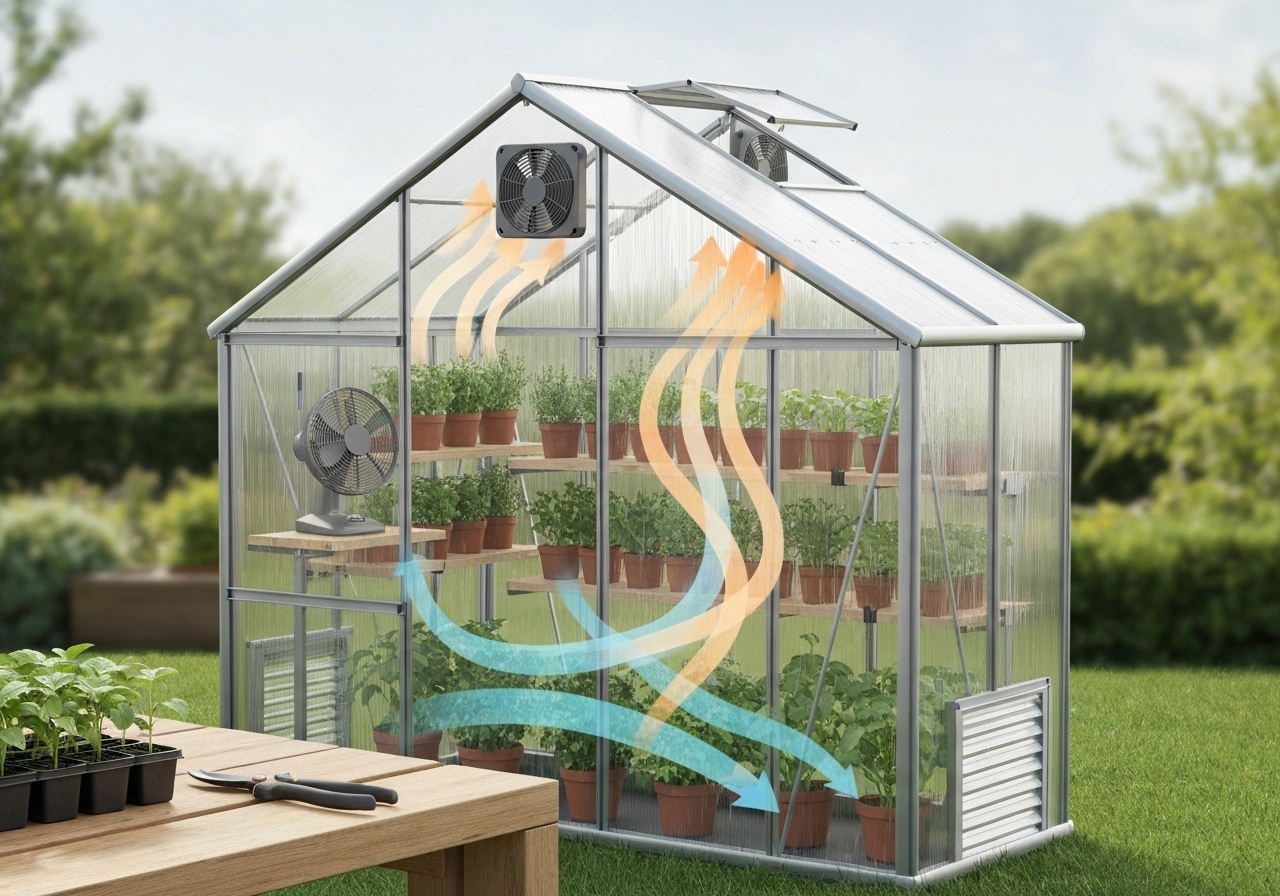
Create airflow from low intake to high exhaust to utilize natural convection and horizontal movement for uniform temperatures.
Position intake vents low (near floor) and exhaust vents high (ridge or upper wall) to remove warm air efficiently.
Include cross-ventilation by placing intake and exhaust on opposite sides when possible to maintain even horizontal air movement.
How to size vents and fans for a mini-greenhouse?
Calculate fan size using greenhouse volume and desired air changes per hour (ACH).
Use the formula: Required CFM = Volume (cu ft) x ACH / 60.
Example: An 8 ft x 10 ft x 7 ft structure has volume 560 cu ft. For 30 ACH, CFM = 560 x 30 / 60 = 280 CFM.
Aim for 15-30 ACH for typical cooling needs; use higher ACH (30-60) during extreme heat or when supplemental lights add heat.
Follow university extension guidance for local climate adjustments; many extensions provide ACH and vent-area recommendations for hobby greenhouse sizes.
How to size passive vent area
Use an openable vent area equal to 10-20% of floor area; 15% is a practical target for balanced performance.
For an 8×10 greenhouse (80 ft2), aim for 8-16 ft2 of total vent area; split between low inlets and high exhausts.
What equipment choices work best for mini-greenhouse venting?
Select a combination of vents, fans, thermostats, and controllers that match your structure and energy goals.
Passive equipment options
- Ridge vents: use on peaked roofs to exhaust hot air.
- Sidewall vents: use hinged or sliding vents for cross-ventilation.
- Roll-up sides: use in hoop-style mini-greenhouses for large open area.
- Insect screens: use fine mesh to keep pests out while allowing airflow.
Active equipment options
- Exhaust fans: choose inline or wall-mounted fans sized by CFM.
- Intake louvers: use gravity or powered louvers to balance airflow.
- Circulation fans: install small oscillating fans to eliminate dead zones.
- Thermostats and humidistats: automate fan activation based on thresholds.
- Solar-powered fans: use for off-grid, low-energy setups with modest CFM needs.
Automated vent openers
Use wax-expansion vent openers for passive automation that requires no electricity for roof vents.
Use linear actuators or 12V controllers when precise, programmable control is required and electricity is available.
How should I place vents and fans for best effect?
Place exhaust fans at the highest point or on the leeward wall for maximum heat removal.
Place intake vents on the downwind or shaded side, low on walls to draw cooler air in under plants.
Place circulation fans inside the structure to move air gently across plant canopies and prevent stratified pockets.
How to control humidity without harming temperature control?
Target relative humidity of 50-70% for most vegetables and herbs; reduce humidity during foliage-disease-prone periods.
Use timed venting, increased air exchanges, and dehumidifying fans to reduce humidity after watering or during warm, still days.
Use heating in winter combined with limited ventilation to reduce condensation while maintaining adequate CO2 exchange.
How to manage winter ventilation and frost protection?
Vent less at night when outside temperatures drop; ventilate during daytime sunny periods to use solar gain while avoiding cold drafts at night.
Install thermal curtains or removable insulation to conserve heat at night while using vents during the day to control humidity.
Place thermal mass such as water barrels to moderate nighttime temperature swings and reduce the need for extended ventilation during cold spells.
When should I vent in freezing conditions?
Vent briefly on bright days to reduce humidity but close vents rapidly if outside temperatures drop near freezing to protect tender plants.
Monitor leaf temperature and use frost cloth when outside air threatens plant tissue even if internal air seems acceptable.
How to integrate shading with venting?
Install internal or external shade cloth to lower peak solar heat and reduce fan runtime during hot days.
Use reflective whitewash or retractable shade to change shading level seasonally and respond to ventilation capacity.
How to automate and schedule ventilation?
Use thermostats to trigger exhaust fans at set temperatures and humidistats for humidity-driven activation.
Use timers for periodic air exchanges and to run circulation fans continuously at low speed to stabilize microclimate.
Combine sensors to create rules: run fans when temperature exceeds X, or humidity exceeds Y and it is daytime.
Recommended sensor settings
- Temperature setpoint: 68-78 F for cool-season crops, 75-85 F for warm-season crops.
- Humidity setpoint: 50-70% during active growth; reduce to 40-60% when disease pressure is high.
- Vent hysteresis: set 1-3 F or 5% RH hysteresis to prevent rapid cycling.
How to calculate an example venting system for a backyard mini-greenhouse?
Step 1: Measure interior volume (length x width x height).
Step 2: Choose target ACH. Use 15-30 ACH as a general target; use 30+ for high-light, high-heat scenarios.
Step 3: Calculate required CFM: CFM = Volume x ACH / 60.
Step 4: Size passive vents to provide ~15% openable area of floor space; split low and high openings.
Example: 6 ft x 8 ft x 6 ft volume = 288 cu ft. Target ACH = 30. Required CFM = 288 x 30 / 60 = 144 CFM. Choose a fan rated slightly higher (160-200 CFM) to allow filter resistance and degradation over time.
What are common pitfalls and how to avoid them?
Failing to provide matching intake area causes fans to pull from gaps and create negative pressure and drafts.
Over-venting in winter wastes heat; under-venting in summer causes heat stress. Use sensors and hysteresis to stabilize control.
Using too-fine insect screens without compensating for the reduced airflow increases fan load; choose appropriate mesh and size fans accordingly.
How do I prevent disease while maintaining ventilation?
Vent regularly to reduce leaf wetness hours and lower pathogen prevalence.
Space plants and use circulation fans to dry foliage rapidly after watering or rain events.
Sanitize vents, fans, and surfaces seasonally to remove spores and biofilms that spread disease.
How to include pest and pollinator considerations in venting?
Use fine mesh screens for pest exclusion but design removable or hinged sections for manual pollinator access during crop flowering.
Integrate timed openings or place small port-access panels for bees or mechanical pollinators if natural pollination is needed.
What low-energy options exist for sustainable venting?
Install solar-powered ventilation fans for remote or grid-limited sites to run exhaust fans during peak sun when ventilation need is greatest.
Use passive solar chimney designs to enhance natural convection through a darkened duct that heats and rises with sun exposure.
Use thermal mass to reduce both heating and cooling energy use and to smooth diurnal temperature swings.
How should I maintain ventilation components?
Inspect and clean fan blades, housings, and louvers at least twice per season.
Lubricate fan bearings, tighten mounts, and check electrical connections for wear annually.
Replace insect screens or repair tears to prevent clogging and ensure proper airflow.
What seasonal checklist will keep venting reliable year-round?
Spring: Clean vents and fans; test controllers; remove winter insulation; check for spring pests.
Summer: Monitor fan runtime and increase shading if fans are maxing out; check for concentrated heat zones.
Autumn: Service heaters and thermal curtains; verify vents close fully for cool nights.
Winter: Check thermal mass and insulation; run ventilation only when humidity control is required during daytime warming.
How does microclimate mapping inform venting choices?

Use microclimate mapping around your site to locate sun, wind, and thermal pockets that affect vent placement and sizing.
Map sunflecks and wind corridors to orient intake vents for cool air and exhaust vents where heat collects.
Reference site microclimate strategies like those used in microclimate mapping guides to optimize greenhouse orientation and vent layout; see resources on microclimate mapping for implementation ideas.
How do crop rotation and plant choice affect ventilation?
Rotate crops to seasons and choose varieties adapted to the controlled greenhouse microclimate to reduce extreme ventilation requirements.
Plan warm-season crops during months when ventilation capacity meets heat loads and cool-season crops when limited venting conserves warmth.
Use crop rotation planning ideas from small-farm rotation strategies to sequence greenhouse beds for disease break and humidity management; see adaptive rotation plans for small-scale examples you can adapt to greenhouse beds.
How does irrigation strategy interact with ventilation?
Use drip and sub-irrigation to lower canopy wetness and reduce humidity spikes after watering.
Time irrigation to early morning so plants can dry during the day with ventilation active.
Incorporate regenerative micro-irrigation techniques to match water delivery to plant demand and minimize unnecessary humidity increases; learn low-water strategies at regenerative micro-irrigation.
How to troubleshoot common ventilation problems?
If hotspots persist, add circulation fans and adjust louver placement to move air to dead zones.
If humidity stays high despite fans, increase air changes or reduce irrigation timing; check for condensation sources such as leaks or cold surfaces.
If fans fail to move air, inspect for clogged screens, blocked intakes, or insufficient intake area.
How to test and validate your venting plan?
Install temperature and humidity dataloggers at plant canopy height and near exhaust vents.
Run test cycles at high solar input and measure maximum temperatures, minimum humidity, and recovery times after vent activation.
Adjust fan CFM, vent area, and control setpoints until maximum temperature, RH excursions, and CO2 drops are within acceptable ranges for your crops.
What final design checklist should I follow before planting?
- Confirm fan CFM using volume x ACH / 60 calculations.
- Verify intake area equals or exceeds fan manufacturer recommendations; ensure low and high vent separation.
- Install sensors at canopy level and test control hysteresis settings.
- Fit insect screens and consider removable sections for pollination.
- Install thermal curtains and place thermal mass for winter buffering.
- Create a seasonal venting schedule and perform a dry-run automation test.
Which local resources and references are helpful?
Consult your regional university extension for specific ACH and vent-area guidance for local climate conditions.
Use Royal Horticultural Society and extension publications for crop-specific humidity and temperature ranges.
Rely on manufacturer specifications for fan CFM and static pressure when selecting equipment.
How to start with a simple, low-cost backyard venting setup?
Start with two passive vents—one low inlet and one high ridge exhaust—and add an inexpensive thermostat-controlled fan rated for your calculated CFM.
Install a circulation fan and insect screens, test with dataloggers, and upgrade shading or add thermal mass as you monitor performance.
Gradually automate with a fan controller and solar power if grid power is a concern.
What ongoing practices ensure year-round success?
Monitor microclimate data weekly, adjust setpoints seasonally, and maintain equipment seasonally to extend the life of components.
Rotate crops, use targeted irrigation, and apply sanitary practices to reduce the need for aggressive ventilation due to disease outbreaks.
Integrate venting choices with broader on-farm practices such as crop mapping and microbial soil health strategies to support resilient production systems; explore mapping and soil enrichment methods in related resources on microclimate farming and microbial consortia design.
Implement venting plans iteratively: measure, adjust, and record outcomes to refine settings for your specific backyard microclimate.
Further reading and practical references
Review university extension greenhouse ventilation guides and the Royal Horticultural Society for crop-specific setpoints and safety margins.
Consult small-farm design resources for integrating vents with rotation and soil health programs, including microclimate farming and microbial consortia design resources.
Plan, test, and adapt your backyard mini-greenhouse venting plan to achieve stable year-round production with minimal energy and maximum plant health.


